Contributed by Lokesh M on 5 Sep 2013
Project Scanner is a code scrutinizer that helps review the project source code to validate check-lists. We can add any number of checklists and each checklist can contain any number of items based on our needs. Few checklists are listed below:
and many more.
This tool will come in handy once you start using it. I will be taking you through the features currently supported by this tool along with the screenshots for clear explanation.
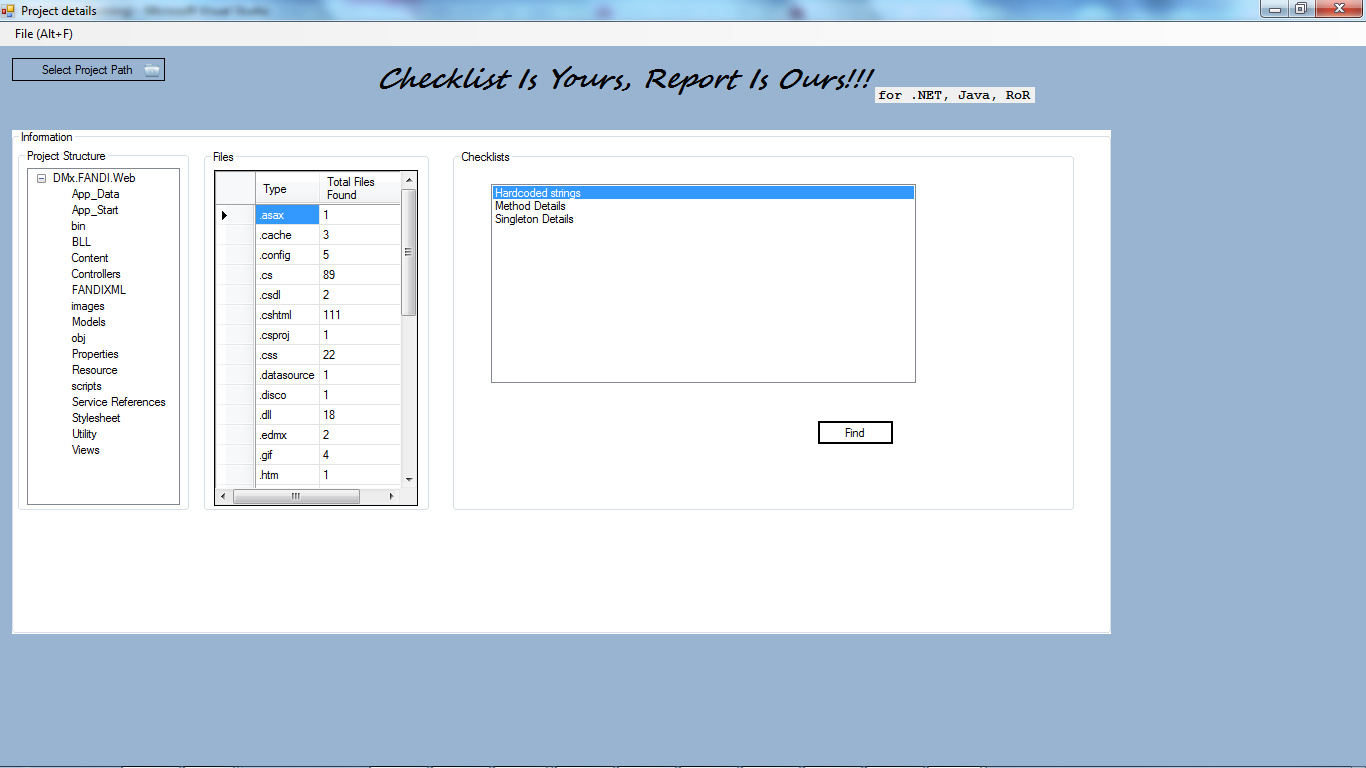
Above is the home screen. Here, it asks you to “select project”. As soon as a project has been selected, it lists out the project structure and the number of files along with the count in a tree view pane. List-box towards the right would display a list of check-lists. Currently, it has three checklists:
a. Hardcoded strings
b. Method details
c. Singleton Detail
Selecting the option “Hardcoded strings” and clicking on “Find” button would display the following screen:
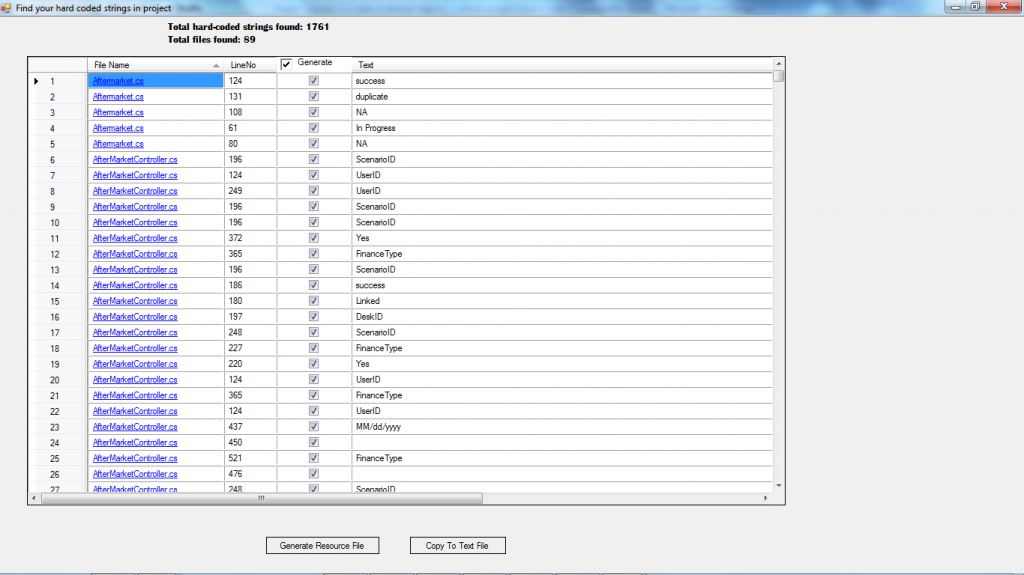
In the first line of the table, under “text” column, the word “success” is hard coded in “Aftermarket.cs” file at line no. 124. There are totally 1761 such strings found in 89 cs files. To move these strings to a resource/text file, click on the corresponding button at the bottom. A resource file is then generated with key and the corresponding value. For instance, key/value pair generated for the first four hard-coded strings are shown below:

Note: Once the resource file is generated, include it in the project.
Next, we will deal with identifying the number of methods found along with the line count, try-catch and its access modifiers. To do this, select “method details” from the check-lists on home page and click on “find” button. The following screen would then be displayed:
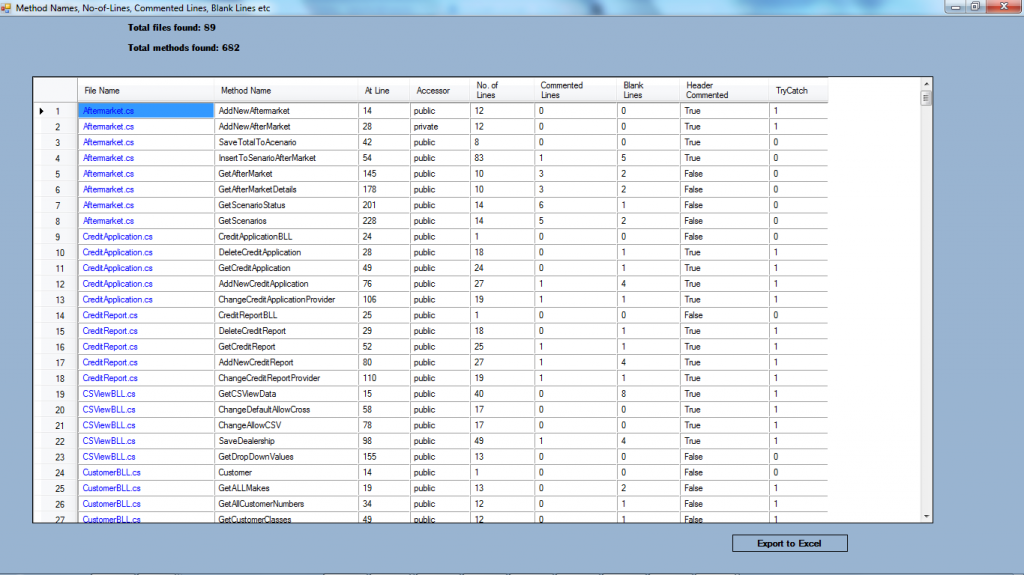 At the top of the page, it displays that there are 682 methods found in 89 files. The first line of the table displays the method name “AddNewAftermarket” found in “Aftermarket.cs” file at line no. 14 and it is a “public” method consisting of 12 lines of code. There are no commented lines and blank lines and has one try-catch block. This tool comes with an option to export the data in the table to an excel file.
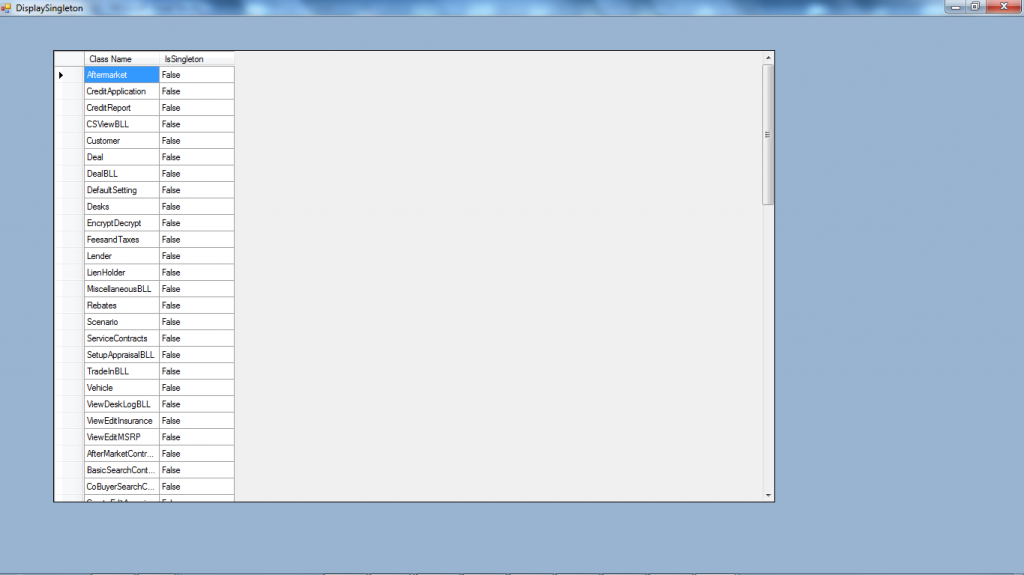
To find the list of files where singleton is implemented, select “Singleton Details” from home screen. The following screen would then appear, where “true” indicates singleton exists in the file and “false” indicates singleton does not exist in the specified file.
Now, let us get to know how to replace the hard-coded strings by generated Keys?
In the home screen, go to the ‘File’ Menu and select “Replace Strings”. The following screen would then get displayed. Now, browse the resource file and click on “Resource” button. You would then observe that hard-coded strings in all files would get replaced by resource keys and replaced ones would keep updating in the list box found at the bottom of the screen.
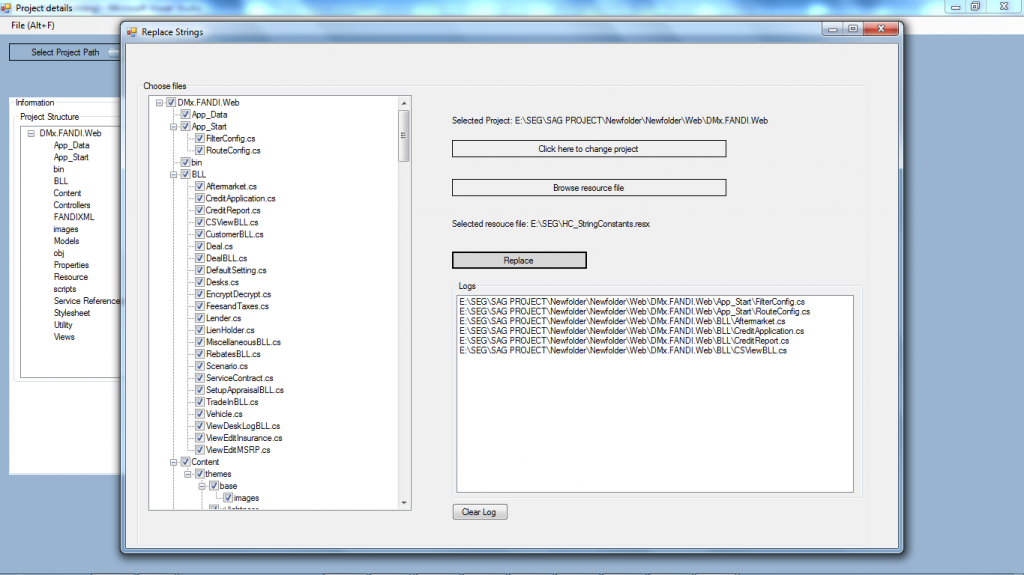
When all the files have been processed, the status will be triggered to user.
These are the features we have currently implemented in the project scanner.
Project scanner has been envisioned with many more functionalities in future. Few of them are listed down below:
This list is never-ending as the app is customizable as per a project manager’s inputs and requirements.
-Contributed by Lokesh.M, Project Scanner Team
Visit us at Neevtech.com to know more about our offerings.
Tags: access modifiers, checklist, classes, code, code scrutinizer, cs, export, line count, methods, project manager, Project Scanner, project source code, project structure, RESOURCE KEYS, singleton, strings, tag, tree view pane, variables
facebook comments:
© 2013 Blog | Neev Technologies
Leave a Comment